Showing posts with label projects. Show all posts
Monday, March 18, 2013

natural easter eggs: botanical blueprints

botanical blueprint eggs
I've said before that I prefer my Easter eggs to be au natural. At the Goddard's Barberry Hill Farm where James and I got married, they have chickens producing eggs in more beautiful shades than any dye could conjure. But when I saw these botanical blueprint tiles a few weeks ago, I decided to try my hand at recreating the look...on Easter eggs. I made a preemptive batch to share with you, in case you wanted to try them for yourselves.
dyeing eggs with red cabbage
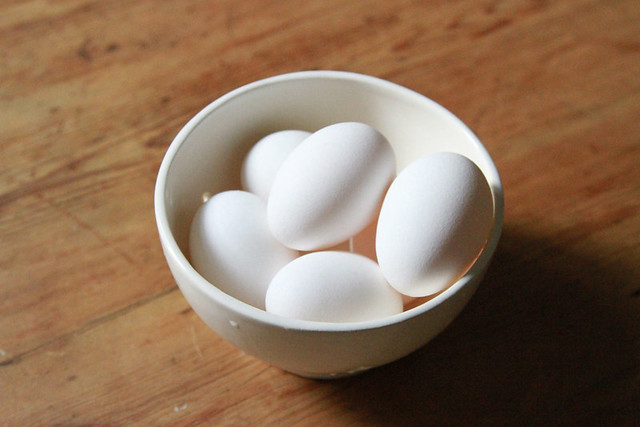
Finding stark white eggs that are from chickens that have been treated kindly is a little tricky, but I managed to find a batch at a nearby market that met my standards. I hardboiled them before I began and plunged them into icy water afterward to stop them from cooking. Really nice instructions for hard-boiled eggs, at The Kitchn.
making botanical blueprint eggs
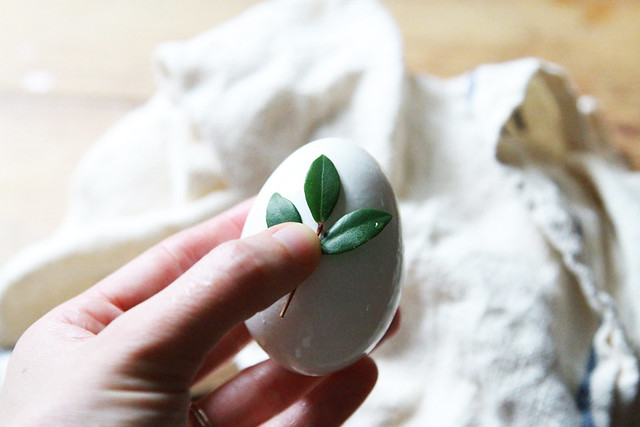
Next, I chose my botanicals. I wanted to experiment with a range of shapes and sizes so I bought a few stems from a local florist, pinched an end off my maidenhair fern and pilfered a leaf or three from another fern I spotted growing in the garden in front of my building.
making botanical blueprint eggs
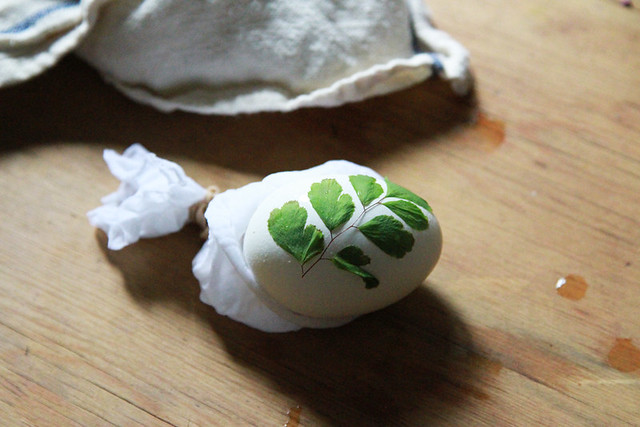
In general I found that the softer the leaf, the more successful the print. The small ferns that I thought were going to be perfect ended up producing a much less dramatic print than I expected. I think the problem was the stiffness of the leaves, which allowed dye to sneak its way underneath them instead of the leaf adhering itself to the shell.*
making botanical blueprint eggs
The maidenhair fern on the other hand, clung to the egg perfectly.
making botanical blueprint eggs
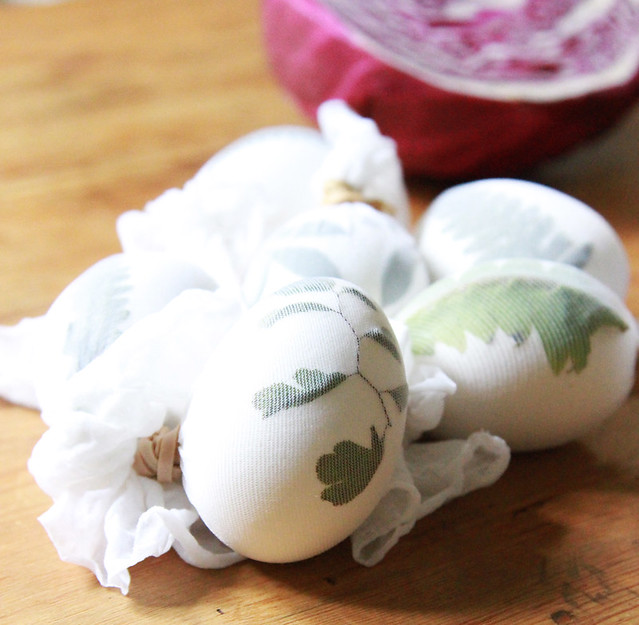
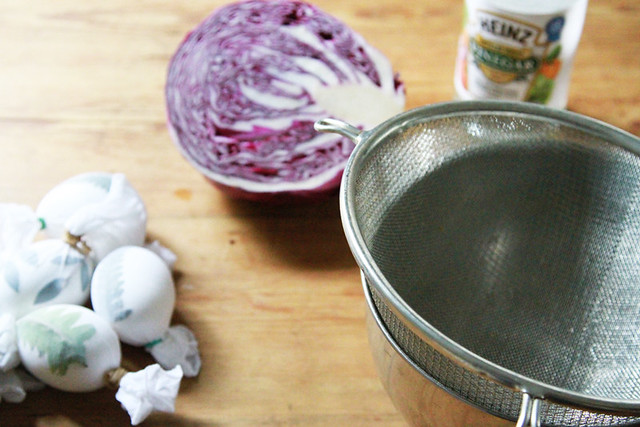
I used lengths of cut up white stockings as a way to hold the leaf to the egg during dyeing. I had the most success with using two rubber bands per egg and wrapping them up the way you might a butterscotch hard candy. It's a slightly laborious process, but I'd developed a good technique by the time I wrapped my sixth egg.
dyeing eggs with red cabbage
While I wrapped my eggs, I had a solution of red cabbage and water boiling away on the stove. In what can only be described as magic, red cabbage produces the most beautiful natural blue dye that you can imagine.dyeing eggs with red cabbage
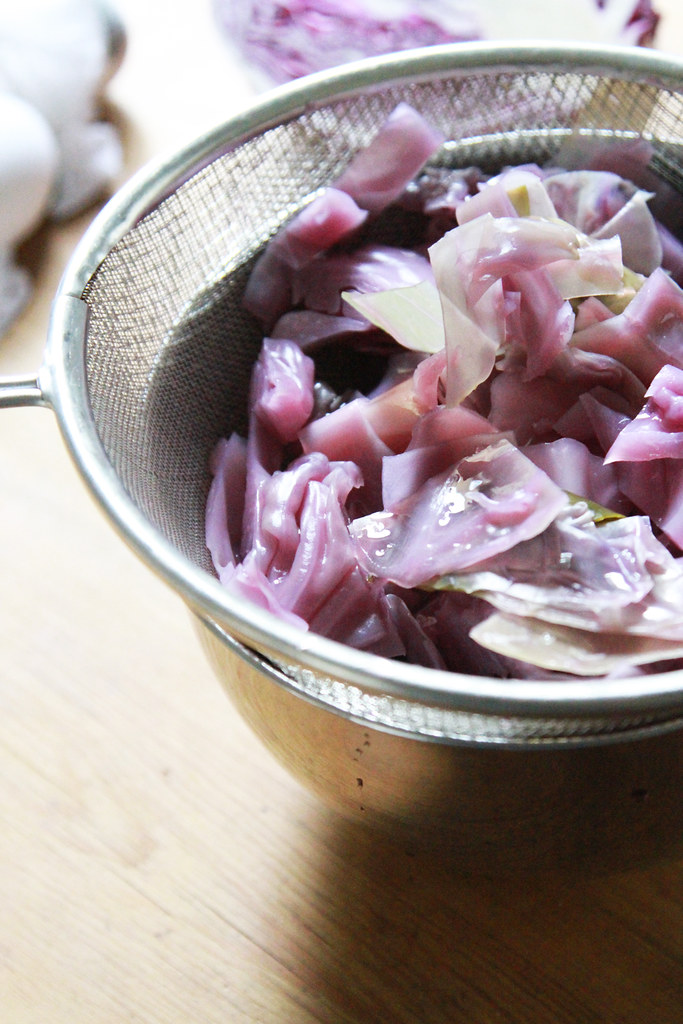
To make the dye, chop up your cabbage (I started with just half and then opted to use the entire thing), and fill your pot with enough water so the cabbage has some room to move, but not so much that your dye will be too diluted. Make sure you use a stainless steel pot to avoid discoloration. This is not the moment to bring out your white enamel. Bring the mixture to a boil on the stove, and then allow the cabbage to simmer in the water for at least a half an hour. I left mine in a little longer, just to be sure.
dyeing eggs with red cabbage
When the water has become a deep reddish purple, remove the pot from the stove and let the whole batch cool. Sticking the pot outside for a little while will speed up the process. If you don't let the dye cool, you'll end up overcooking your eggs, so it's worth the wait. Once cool, strain the dye with a large sieve.
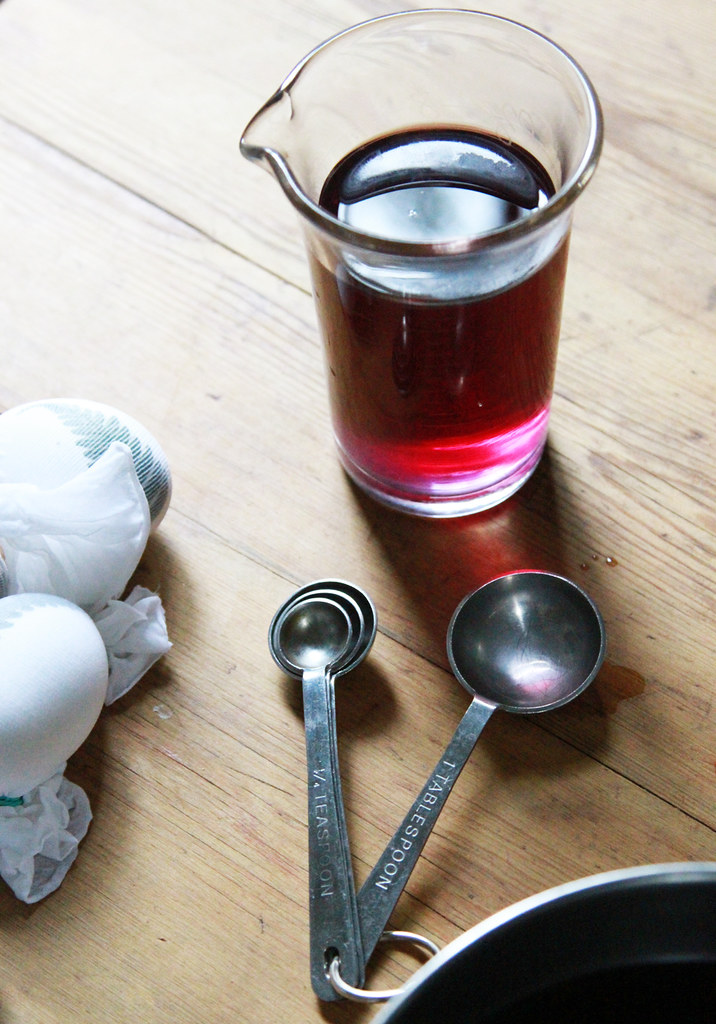
dyeing eggs with red cabbageAdd white vinegar to your cooled dye at a ratio of one tablespoon vinegar for each cup of dye. Some recipes that I looked at have you add the vinegar while the cabbage is still cooking. I'm not sure if there are merits to doing it one way or the other. Any theories out there?
dyeing eggs with red cabbage
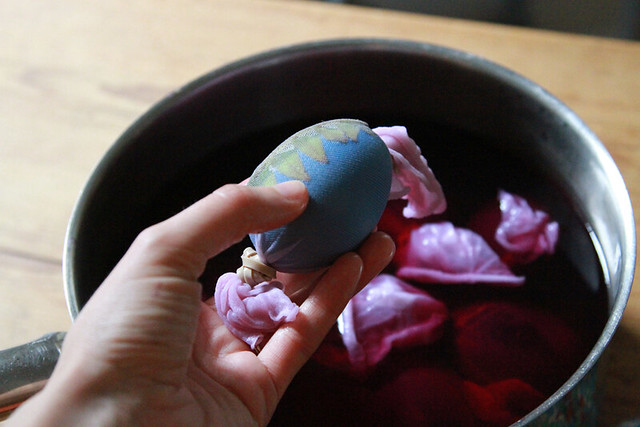
Now is the time to dunk your little bundles! I poured my dye back into my original pot so that the eggs wouldn't be on top of each other. I cleared a spot in the fridge and let the whole gang hang out in there overnight. The length of time you allow your eggs to sit in the dye bath will determine their color. If you're hoping for more of a robin's egg blue, you should take yours out sooner than I did. I was admittedly perplexed by recipes that advised merely dipping eggs in the dye bath. Dipping the eggs briefly resulted in no discernable color change in this kitchen. Slow and steady wins this race.
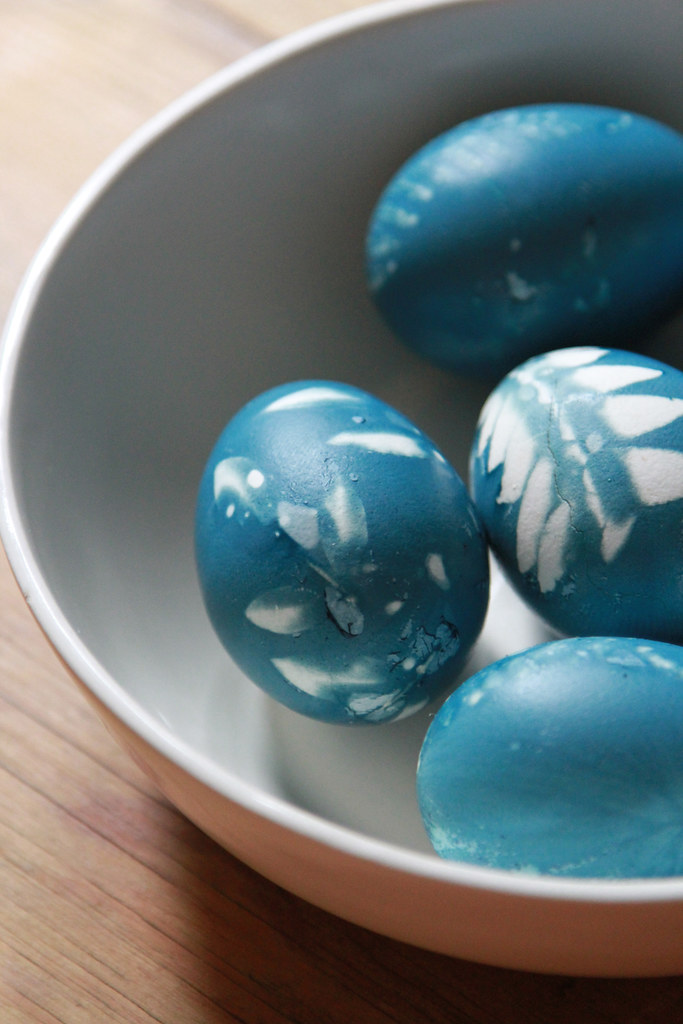
botanical blueprint eggs
Yesterday morning, when I unwrapped my eggs I was somewhat underwhelmed by the result. This is not a project for the perfectionists among us. But I've decided I like the subtler, softer look. Even if the prints are not crystal clear, they're still awfully pretty. Next year I think I might forgo the botanicals and opt for a cheery rainbow of turmeric, beet, and red cabbage dyes instead.
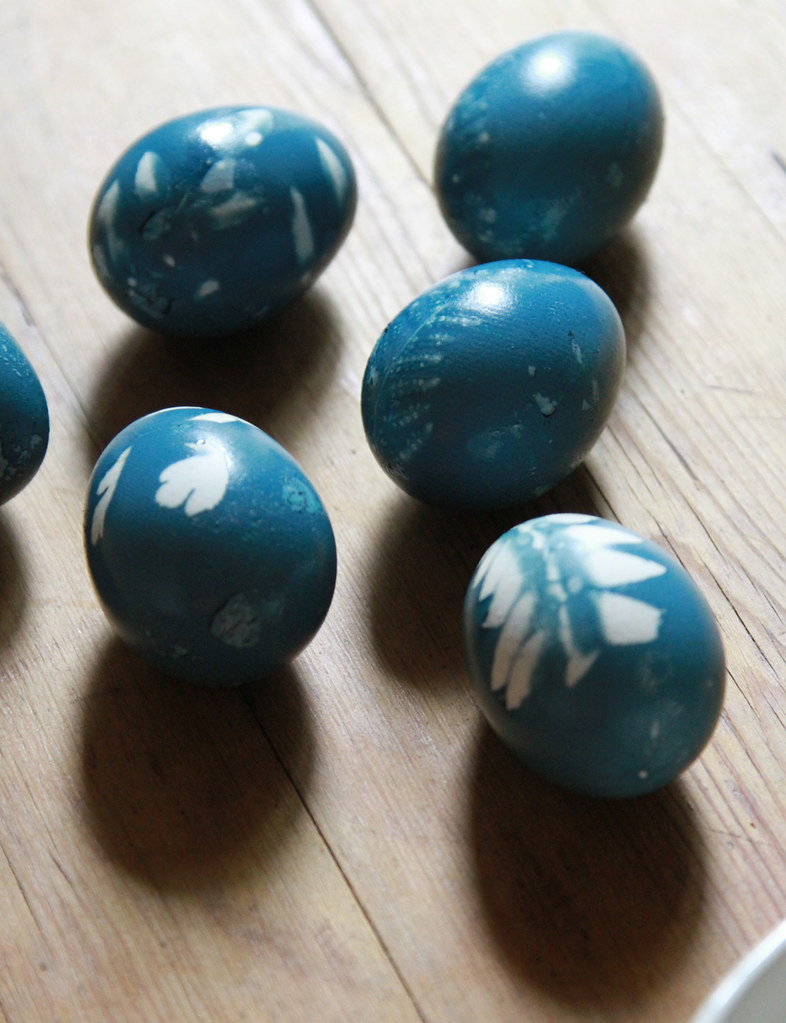
botanical blueprint eggs
I found the following two articles to be especially helpful in making my eggs: Vibrant Eggs, Dyed Naturally for dye-making and Masked Easter Eggs for the stocking tip, because it turns out there's nothing new under the sun.

*Admission: I did neglect to adhere my leaves to the egg shells using egg whites as Martha Stewart advises...for shame. There's always next time.
You have read this article botanical prints / easter eggs / natural easter egg dye / projects / red cabbage easter egg dye with the title projects. You can bookmark this page URL http://newbieny.blogspot.com/2013/03/natural-easter-eggs-botanical-blueprints.html. Thanks!
Thursday, January 17, 2013

paperwhites, bottled.

paperwhites9796
paperwhites9833
paperwhites9946

I've been growing these bulbs since mid-December and teasing you with bits and bobs of them ever since. Finally, they've blossomed and I've compiled a quick and dirty (though not so very dirty) tutorial for Gardenista. I'm hoping the post will give you the nudge you need to haul out your own collection of bottles and plug them up with bulbs. No such collection? This might be just the occasion to splurge on that bottle of fancy kombucha. Whatever your vessel, here's three cheers for forcing flowers in winter. Some things just can't wait until spring.

Helpful advice and more pretty pictures, thisaway.
You have read this article elsewhere / gardenista / paperwhites / projects with the title projects. You can bookmark this page URL http://newbieny.blogspot.com/2013/01/paperwhites-bottled.html. Thanks!
Monday, December 17, 2012

make your own beeswax candles

beeswax candle and boxwood
I know I talk a lot about needing a little extra light during these dark days, but I don't think it's a sentiment that can be too often repeated. Especially in the wake of Friday's tragedy, there is even more need to extend a comforting hand and offer a bit of light to a friend in need. This past weekend, I rolled beeswax candles to give as small gifts. Here, a few tips on making your own:
wick
Making your own rolled beeswax candles is almost laughably easy. I used natural medium brood beeswax foundation (the stuff that can actually be used inside bee hives) and cotton wicking from Brushy Mountain Bee Farm to make my tapers. Brushy Mountain has loads of bee-keeping and candle-making supplies and they're my favorite spot for supplies. Truly, the honor is all mine to collaborate with them on this post.

Beeswax foundation comes in long sheets (8 1/2" by 16 3/4" long). Cut in half, each sheet yields two 8 1/4" tapers. When your sheets arrive in the mail, bring the box inside and let the wax warm up to room temperature before handling it.  You can use a knife to cut each sheet in half or do what I did and carefully fold each sheet in half to score it and fold again in the opposite direction to break it in two. If you're worried about tears, bring out a knife. Next, cut a length of cotton wicking to be just a bit longer than the length of your sheet.rolling beeswax tapers
The wax is slightly sticky, so you can press the wick into place along the edge and carefully begin to curl the edge of the wax around it (if you didn't use a knife, begin rolling on the side with the rough edge). The wax is very pliable, but to get a nice neat roll you'll want to work slowly at first. Once you've rolled the wax over the wick a few times, things gets easier and you can use the flats of your fingers to roll up the rest of the way. (Be prepared for a heavenly smell and super soft hands by the time you're finished).
rolling beeswax tapers
If you prefer a thicker candle, don't cut your sheet in half and just keep on rolling. Thicker still? Start the process again with a second sheet of wax. The best part about rolling your own candles is that you can make them any size you'd like: short and squat or long and lean. When you're finished rolling, gently press the edge of the wax sheet to the candle using your fingertips. Because the wax is sticky on its own, you don't need to mess with heat or blow dryers or anything else fancy. A few gently presses will work just fine.
beeswax candle and boxwood
Once you've finished rolling your candles, tie two together to make a sweet little gift. I wrapped mine in a small length of parchment paper and tied it up with grosgrain ribbon and a sprig of boxwood.
miniature boxwood wreath
If you're in the mood for for something a little extra special, you can use the same boxwood to make festive candlesticks for the table.
beeswax candle and boxwood
How-to: Take a long boxwood branch and bend it into a circle. I like to allow the smaller shoots to branch off in different directions. Use a small bit of wire to secure the top of the branch to the bottom stem and then place the miniature wreath at the base of your candle before putting it into your candlestick.
candles786beeswax candle and boxwood
As always, make sure not to leave your burning candles unattended. And isn't that the hope after all? Here's to many long meals shared at tables lit by candlelight. Wishing you and yours many of them.
 
Materials for this post were generously provided by Brushy Mountain Bee Farm.
You have read this article beeswax candles / brushy mountain bee farm / holidays / projects with the title projects. You can bookmark this page URL http://newbieny.blogspot.com/2012/12/make-your-own-beeswax-candles.html. Thanks!
Monday, December 10, 2012

giving: cinnamon cardamom honey

cinnamon cardamom honey
This weekend was a grey one. It was one for putting on a thick pair of socks and turning on quiet music and setting to work on a project that eclipses the dreary damp. For me, the project was infusing honey to give as gifts.
honey
It's not that honey has need for much improvement, but subtly infused with herbs or spices it becomes something even more worthy of gift-giving. For the holidays, I decided on an infusion of cinnamon and cardamom. They're two of my favorite cold-weather spices and ones that are just right for stirring into cups of black tea with milk on Christmas morning or sweetening whipped cream for post-sledding hot chocolate.
cinnamon
There are two options when it comes to infusing honey: you can either fill your honey jar with herbs and let them steep for a week before straining it, or you can infuse the honey by heating it with herbs. I chose the latter because I tend toward impatience and heating the honey means you can go from regular old honey to something delicious in a single afternoon.
cinnamon cardamom honey
I used Rachel's suggested method of a make-shift double boiler (heat-resistant mixing bowl over a sauce pan of water) and gently heated my honey that way. For a 32 oz. jar of honey from a local farmer I used 5 cinnamon sticks and 24 cardamom pods (roughly 1 cinnamon stick and 6 cardamom pods for each cup of honey).
cinnamon and cardamom
I sterilized each jar in a much larger pot before adding a sampling of the spices (just enough to look pretty and add some additional flavor without becoming overpowering).
cinnamon cardamom honey
I put a small square of parchment paper between my lid and rim so that I could label the jar. If you want something a little more festive, you could swap in a square of thin fabric.
cinnamon cardamom honey

Infusing honey, step-by-step:

1. For every 1 cup of honey, add 1-2 tablespoons of herbs or spices. (You can use fresh or dried, but keep in mind that fresh herbs need to be completely dry to avoid the risk of bacteria). Lavender, rosemary, sage, thyme, vanilla and (untreated) pine are all delicious options. If you use cardamom, make sure to crack open each pod so that the seeds inside are exposed.

2. Heat honey with herbs until it reaches around 160 degrees F. It's not totally necessary that you use a candy thermometer to measure temperature--I've seen honey infused many times without one--but if you want to be technical, measure away.

3. Allow the honey to simmer for about ten minutes and then cool (anywhere from 15 minutes to several hours is fine). Once cooled, reheat the honey until it becomes thin enough to easily pour. I honestly don't know the reason for this step, but it's what the experts do, so I do it too.

4. Pour honey through a sieve into sterilized jars. (Expect some honey loss--I started with 32 oz. and was able to fill three 8 oz. jars (24 oz.) with just a small amount left over). Cover the honey tightly with a lid and wrap it up before you eat it all. Honey is shelf stable and should be good for (at least) a year!
You have read this article cinnamon cardamom honey / holidays / infused honey / projects with the title projects. You can bookmark this page URL http://newbieny.blogspot.com/2012/12/giving-cinnamon-cardamom-honey.html. Thanks!
Monday, November 19, 2012

giving: boiled apple cider syrup

apple cider - reading my tea leavesDuring the holidays, and always, it's nice to arrive to a place you've been invited to with a little something extra for your host. It should be known that I don't always manage to follow my own advice with this one, but I do try, I promise. It should also be known that I refuse to call these little tokens hostess gifts. The name is so old-fashioned that it should be scratched right out of Webster's. You have my permission to deface your dictionary.
apple cider - reading my tea leaves
This gift takes a little more planning and time than the mulling spices that I put together last year, but the result is delicious and inspired, and dare I say, better. Reserve this one for someone really special.
boiled apple cider syrup - reading my tea leaves
The concept behind boiled apple cider syrup is about as simple as it sounds. Boil your apple cider down until it becomes thick and syrupy. You'll need a few solid hours at home to make a batch, but the good news is that the simmering cider can be left largely unattended. If you put on a pot when you return home from work in the evening, it should be ready by the time you head off to bed, with only a few stirs in between.
boiled apple cider syrup - reading my tea leaves
Once my cider had thickened to syrup, I strained it through a sieve to trap any solid pieces. A tiny funnel helped me to fill a small glass bottle that I'd sterilized in a pot of boiling water.
boiled apple cider syrup - reading my tea leaves
Aside from the robust taste, the best part about this gift (in the eyes of this history-lover at least) is boiled apple cider syrup's place in the annals of history. Emily Horton's piece on the subject is a delightful and quick read. Make this and you'll have done your part to revive a classic American culinary tradition (go Pats)!
boiled apple cider syrup - reading my tea leaves
Once you've bottled your syrup, make a little tag for your bottle and tie it up with a bit of ribbon and a cinnamon stick for merry-making. Encourage your friends to drizzle this tart syrup into sweet potatoes and brussels sprouts, pie crust and hot toddies.
boiled apple cider syrup - reading my tea leaves
The stuff's so good that if you have a large enough pot, you might consider boiling down a whole gallon and keeping some for yourself. Kept refrigerated, the syrup could last until next Thanksgiving. I have a hunch it'll be polished off long before that.
boiled apple cider syrup - reading my tea leaves

Boiled Apple Cider Syrup
Recipe adapted from this one in the Washington Post.

1 1/2 gallon apple cider

1. Pour apple cider into a large, heavy-bottomed pot. Bring the cider to boil, stirring occasionally.

2. Reduce the heat to medium-low and cook uncovered for 2-3 hours or until it has reduced to about 1 cup. Don't fear: it will take a long time for the cider to turn syrupy. I was convinced mine would just disappear rather than thicken, until finally, thicken it did. Persevere!

3. Once cider has thickened enough to coat the back of a spoon, pour through a sieve to strain any solid bits. (The original recipe didn't mention this step, but I had lots of little floating bits in mine and wanted them out)! Transfer syrup to a sterilized jar. Syrup is ready to use right away and will store indefinitely if refrigerated.

You have read this article apple cider / boiled apple cider syrup / food / projects / thanksgiving with the title projects. You can bookmark this page URL http://newbieny.blogspot.com/2012/11/giving-boiled-apple-cider-syrup.html. Thanks!
Monday, November 5, 2012

make your own fire cider.

fire cider - whole ingredients
fire cider - chopped ingredients
fire cider - filled top view 2
fire cider - vinegar
fire cider - filled top view
fire cider - filled
fire cider - tagged
As the weather takes a turn for the chillier side of things, it's nice to have a little something firey to warm things up and ward off germs. When I'm feeling under the weather, I like having natural cold remedies to rely on. All the better if I've made them myself. Rosemary Gladstar's fire cider has been a pantry staple for herbalists for years and I first learned to make it last year when I was still working at the farm. It was a cold-weather savior around this tiny apartment last winter, and we're hoping for a repeat this year.

The concoction packs an impressive punch and just preparing these hard-working ingredients will do wonders to clear your sinuses. Honestly, prepare yourself for some tears. You can change the exact proportions of ingredients depending on your personal taste, but I used these ingredients and proportions:

1 part chopped onion
1 part grated horseradish root (fresh is better, even if it takes searching a few markets to find it)
1 part peeled and diced ginger
1 part garlic
2 cayenne peppers
Enough apple cider vinegar to cover the herbs (I used about 20 oz of Bragg's Apple Cider Vinegar, my favorite)

After a month (or so) of letting everything sit pretty, strain (and discard!) all the herbs and add a few tablespoons of honey--enough to make the cider just a little bit sweet. 

Once it's steeped and strained, you can sip the stuff by the spoonful as a tonic to support immune function and ease winter cold symptoms.* When you need something a little smoother, mix it up with a bit of warm water and extra honey for a spicy tea. If you're feeling adventurous, throw a dash or two on your braising greens for a spicy treat.

*Suffice to say, I'm no doctor and I'm not making any claims to the contrary, but I do hope you'll consider making a little remedy of your own!
You have read this article fire cider / herbal remedy / immune support / natural cold remedy / natural remedy / projects with the title projects. You can bookmark this page URL http://newbieny.blogspot.com/2012/11/make-your-own-fire-cider.html. Thanks!
Tuesday, October 9, 2012

recycled home.

recycled home
recycled home | windowbox
recycled home | patchworkblanket
Last week, a little package wended its way to my mailbox*, which included Rebecca Proctor's Recycled Home. The sturdy kraft paper volume reminds me of a grown-up version of the kid's craft books I pored over as a child, except instead of including instructions for making wrinkly-faced apple people, I got instructions for making my own window box.  Proctor's book includes lovely images and written instructions for fifty different DIY projects that repurpose and reuse existing materials. I was especially taken by the book's patchwork project. At my mom and dad's house there is a patchwork tweed blanket that my great-grandfather made in his own New York apartment sometime at the beginning of the last century. I like to think that one day I might endeavor to take on the same task. The book is certainly worth a look, though I imagine if you're not an experienced crafter, some of the supplies and instructions might need some additional explanation.

*This post was not sponsored by Laurence King Publishing Ltd., but they were kind enough to send a press copy of Recycled Home for my review.
You have read this article book / projects with the title projects. You can bookmark this page URL http://newbieny.blogspot.com/2012/10/recycled-home.html. Thanks!