
I've said before that I prefer my Easter eggs to be au natural. At the Goddard's Barberry Hill Farm where James and I got married, they have chickens producing eggs in more beautiful shades than any dye could conjure. But when I saw these botanical blueprint tiles a few weeks ago, I decided to try my hand at recreating the look...on Easter eggs. I made a preemptive batch to share with you, in case you wanted to try them for yourselves.
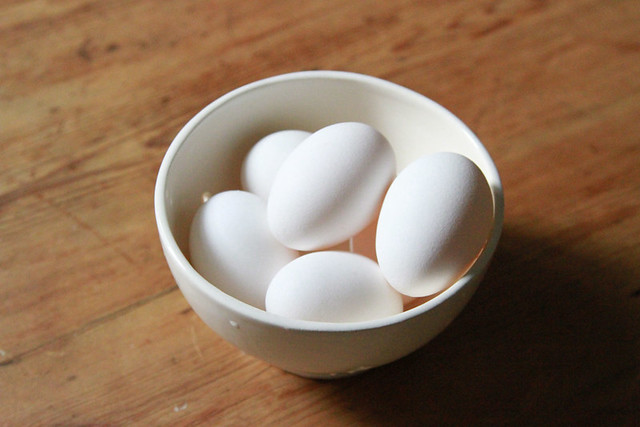
Finding stark white eggs that are from chickens that have been treated kindly is a little tricky, but I managed to find a batch at a nearby market that met my standards. I hardboiled them before I began and plunged them into icy water afterward to stop them from cooking. Really nice instructions for hard-boiled eggs, at The Kitchn.

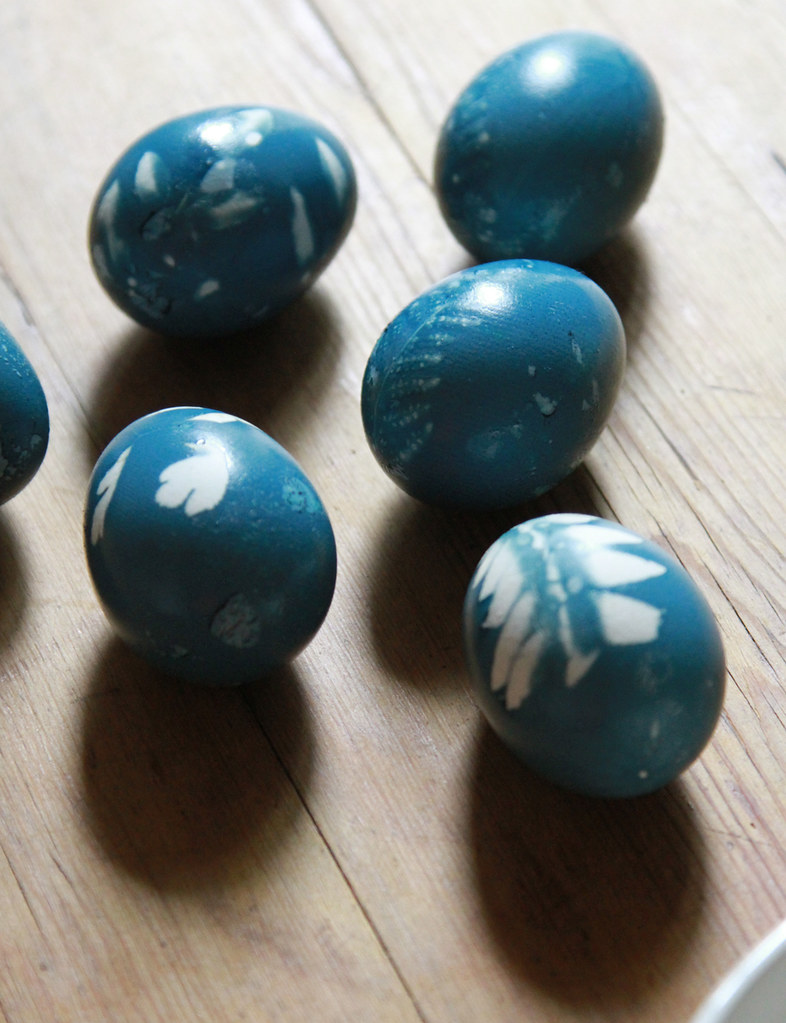
Next, I chose my botanicals. I wanted to experiment with a range of shapes and sizes so I bought a few stems from a local florist, pinched an end off my maidenhair fern and pilfered a leaf or three from another fern I spotted growing in the garden in front of my building.

In general I found that the softer the leaf, the more successful the print. The small ferns that I thought were going to be perfect ended up producing a much less dramatic print than I expected. I think the problem was the stiffness of the leaves, which allowed dye to sneak its way underneath them instead of the leaf adhering itself to the shell.*
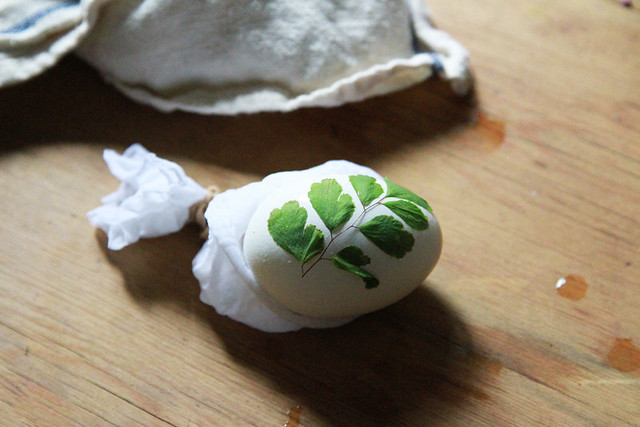
The maidenhair fern on the other hand, clung to the egg perfectly.
I used lengths of cut up white stockings as a way to hold the leaf to the egg during dyeing. I had the most success with using two rubber bands per egg and wrapping them up the way you might a butterscotch hard candy. It's a slightly laborious process, but I'd developed a good technique by the time I wrapped my sixth egg.
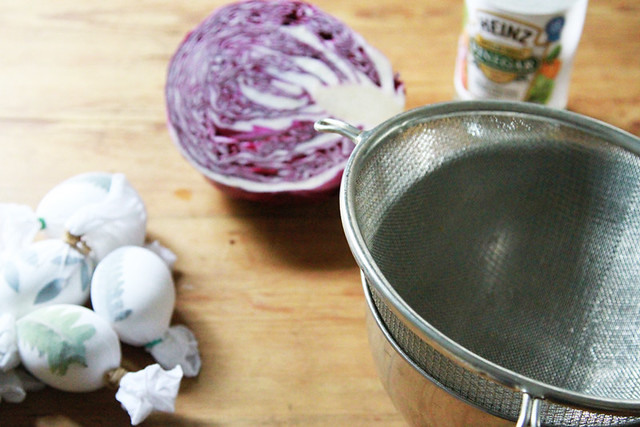
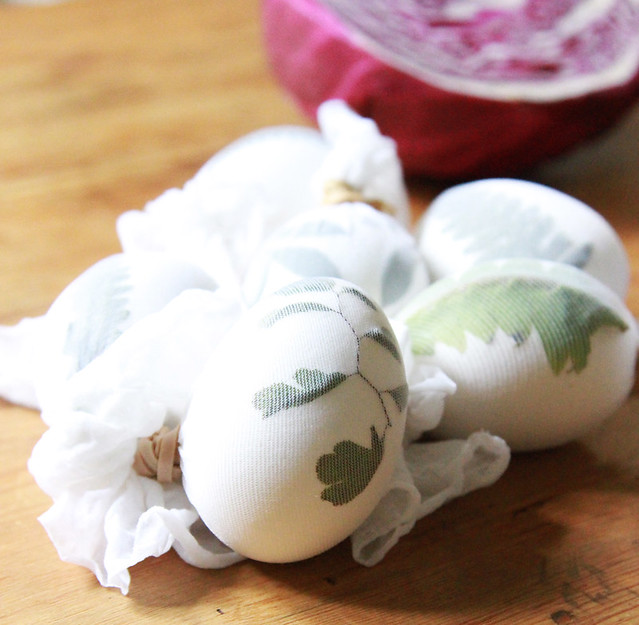
While I wrapped my eggs, I had a solution of red cabbage and water boiling away on the stove. In what can only be described as magic, red cabbage produces the most beautiful natural blue dye that you can imagine.

To make the dye, chop up your cabbage (I started with just half and then opted to use the entire thing), and fill your pot with enough water so the cabbage has some room to move, but not so much that your dye will be too diluted. Make sure you use a stainless steel pot to avoid discoloration. This is not the moment to bring out your white enamel. Bring the mixture to a boil on the stove, and then allow the cabbage to simmer in the water for at least a half an hour. I left mine in a little longer, just to be sure.
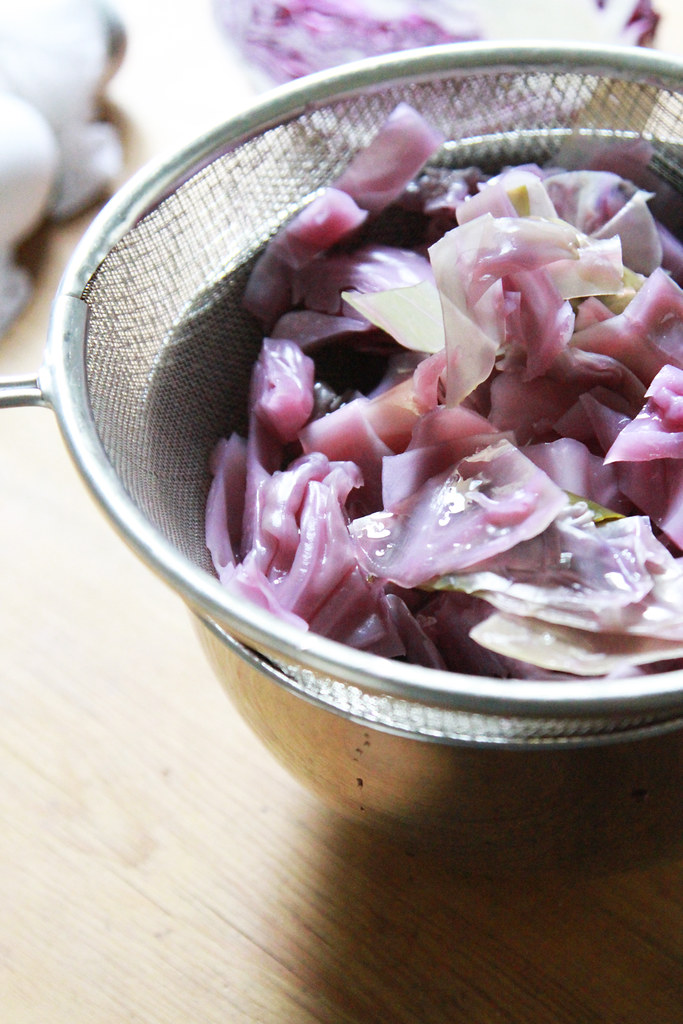
When the water has become a deep reddish purple, remove the pot from the stove and let the whole batch cool. Sticking the pot outside for a little while will speed up the process. If you don't let the dye cool, you'll end up overcooking your eggs, so it's worth the wait. Once cool, strain the dye with a large sieve.
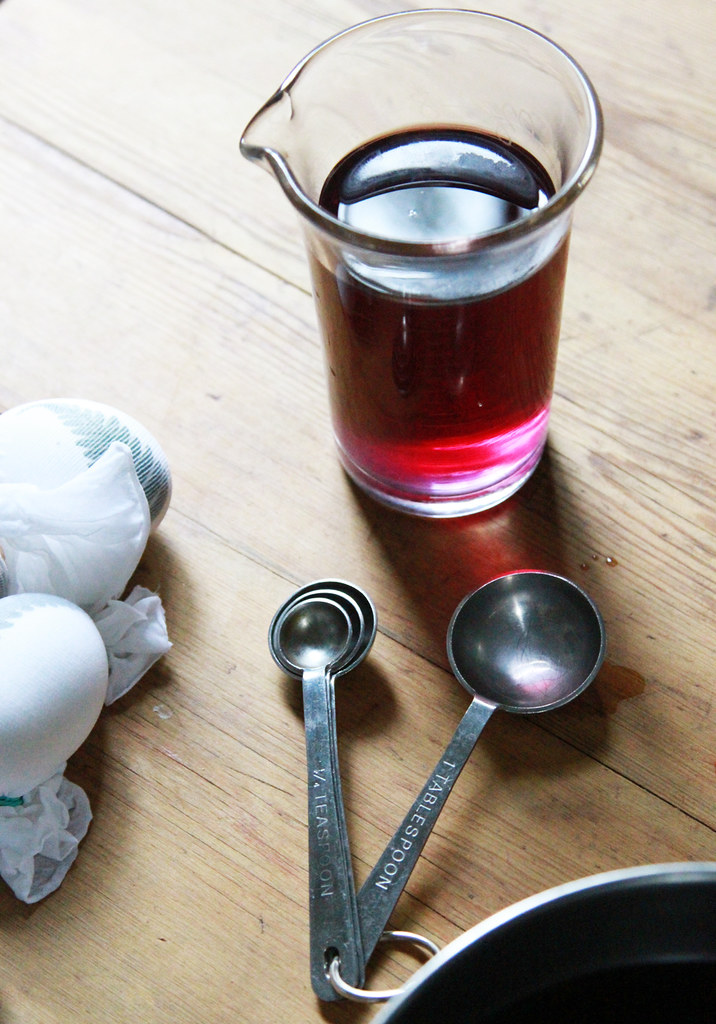 Add white vinegar to your cooled dye at a ratio of one tablespoon vinegar for each cup of dye. Some recipes that I looked at have you add the vinegar while the cabbage is still cooking. I'm not sure if there are merits to doing it one way or the other. Any theories out there?
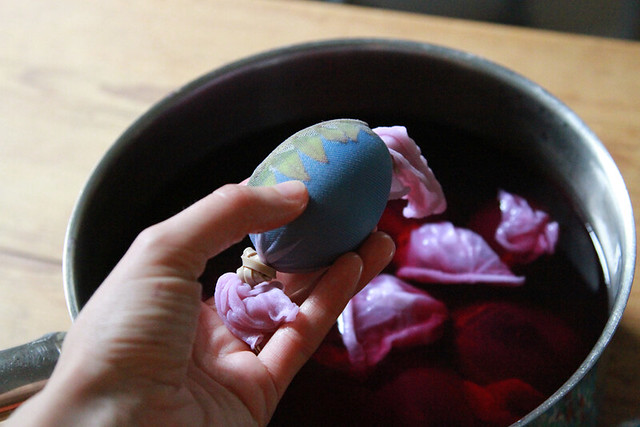
Now is the time to dunk your little bundles! I poured my dye back into my original pot so that the eggs wouldn't be on top of each other. I cleared a spot in the fridge and let the whole gang hang out in there overnight. The length of time you allow your eggs to sit in the dye bath will determine their color. If you're hoping for more of a robin's egg blue, you should take yours out sooner than I did. I was admittedly perplexed by recipes that advised merely dipping eggs in the dye bath. Dipping the eggs briefly resulted in no discernable color change in this kitchen. Slow and steady wins this race.
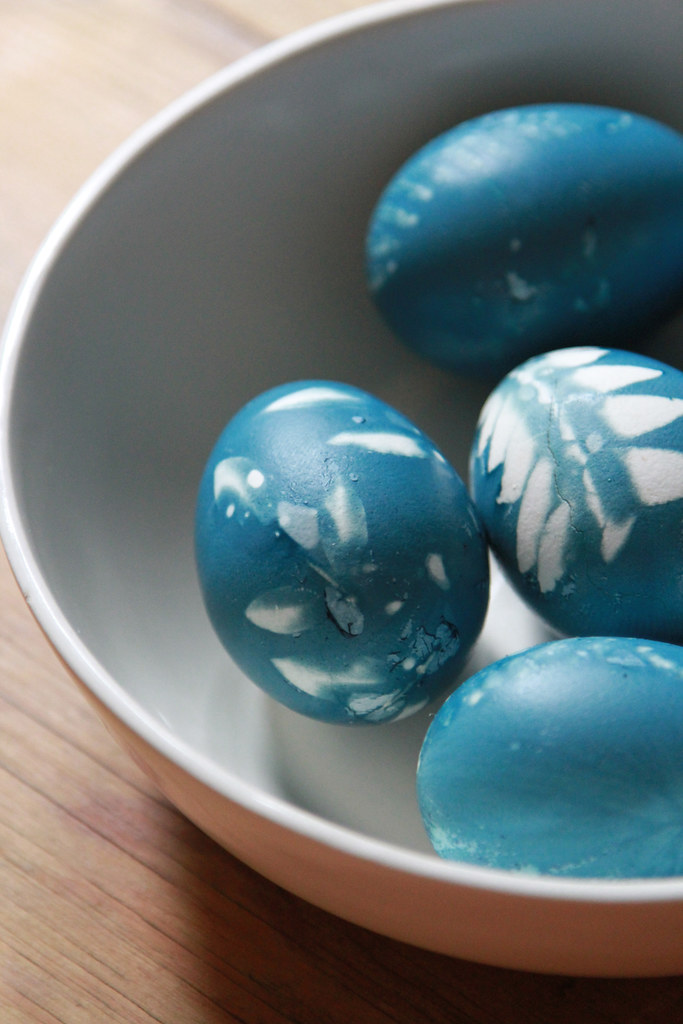
Yesterday morning, when I unwrapped my eggs I was somewhat underwhelmed by the result. This is not a project for the perfectionists among us. But I've decided I like the subtler, softer look. Even if the prints are not crystal clear, they're still awfully pretty. Next year I think I might forgo the botanicals and opt for a cheery rainbow of turmeric, beet, and red cabbage dyes instead.
I found the following two articles to be especially helpful in making my eggs: Vibrant Eggs, Dyed Naturally for dye-making and Masked Easter Eggs for the stocking tip, because it turns out there's nothing new under the sun.
*Admission: I did neglect to adhere my leaves to the egg shells using egg whites as Martha Stewart advises...for shame. There's always next time.
You have read this article botanical prints /
easter eggs /
natural easter egg dye /
projects /
red cabbage easter egg dye
with the title natural easter eggs: botanical blueprints. You can bookmark this page URL http://newbieny.blogspot.com/2013/03/natural-easter-eggs-botanical-blueprints.html. Thanks!


No comment for "natural easter eggs: botanical blueprints"
Post a Comment